This step-by-step guide explains how to set up Single Sign-On in TeleRetro with Okta as your SAML 2.0 Identity Provider (IDP).
Okta SSO is one of the most popular Single Sign-On providers on the market. With Okta your organization can automatically provision and control access to software from one place.
TeleRetro is fully compatible with Okta, and is available through our Enterprise plan. Write to us at sales@teleretro.com to learn more.
What you'll need
- TeleRetro Enterprise plan
- Okta Admin account
What we'll cover
Configuring Okta as a SAML identity provider by completing the following steps:
- Create a new SAML integration in Okta
- Complete the SAML connection in TeleRetro
- Test the new connection
1. Create new SAML integration in Okta
In this step you will create and configure a new TeleRetro SAML integration in Okta.
Create a new SAML 2.0 Integration
- In the Okta Admin Console, go to
Applications>Applications>Create App Integration. - Select
SAML 2.0as the Sign-in method.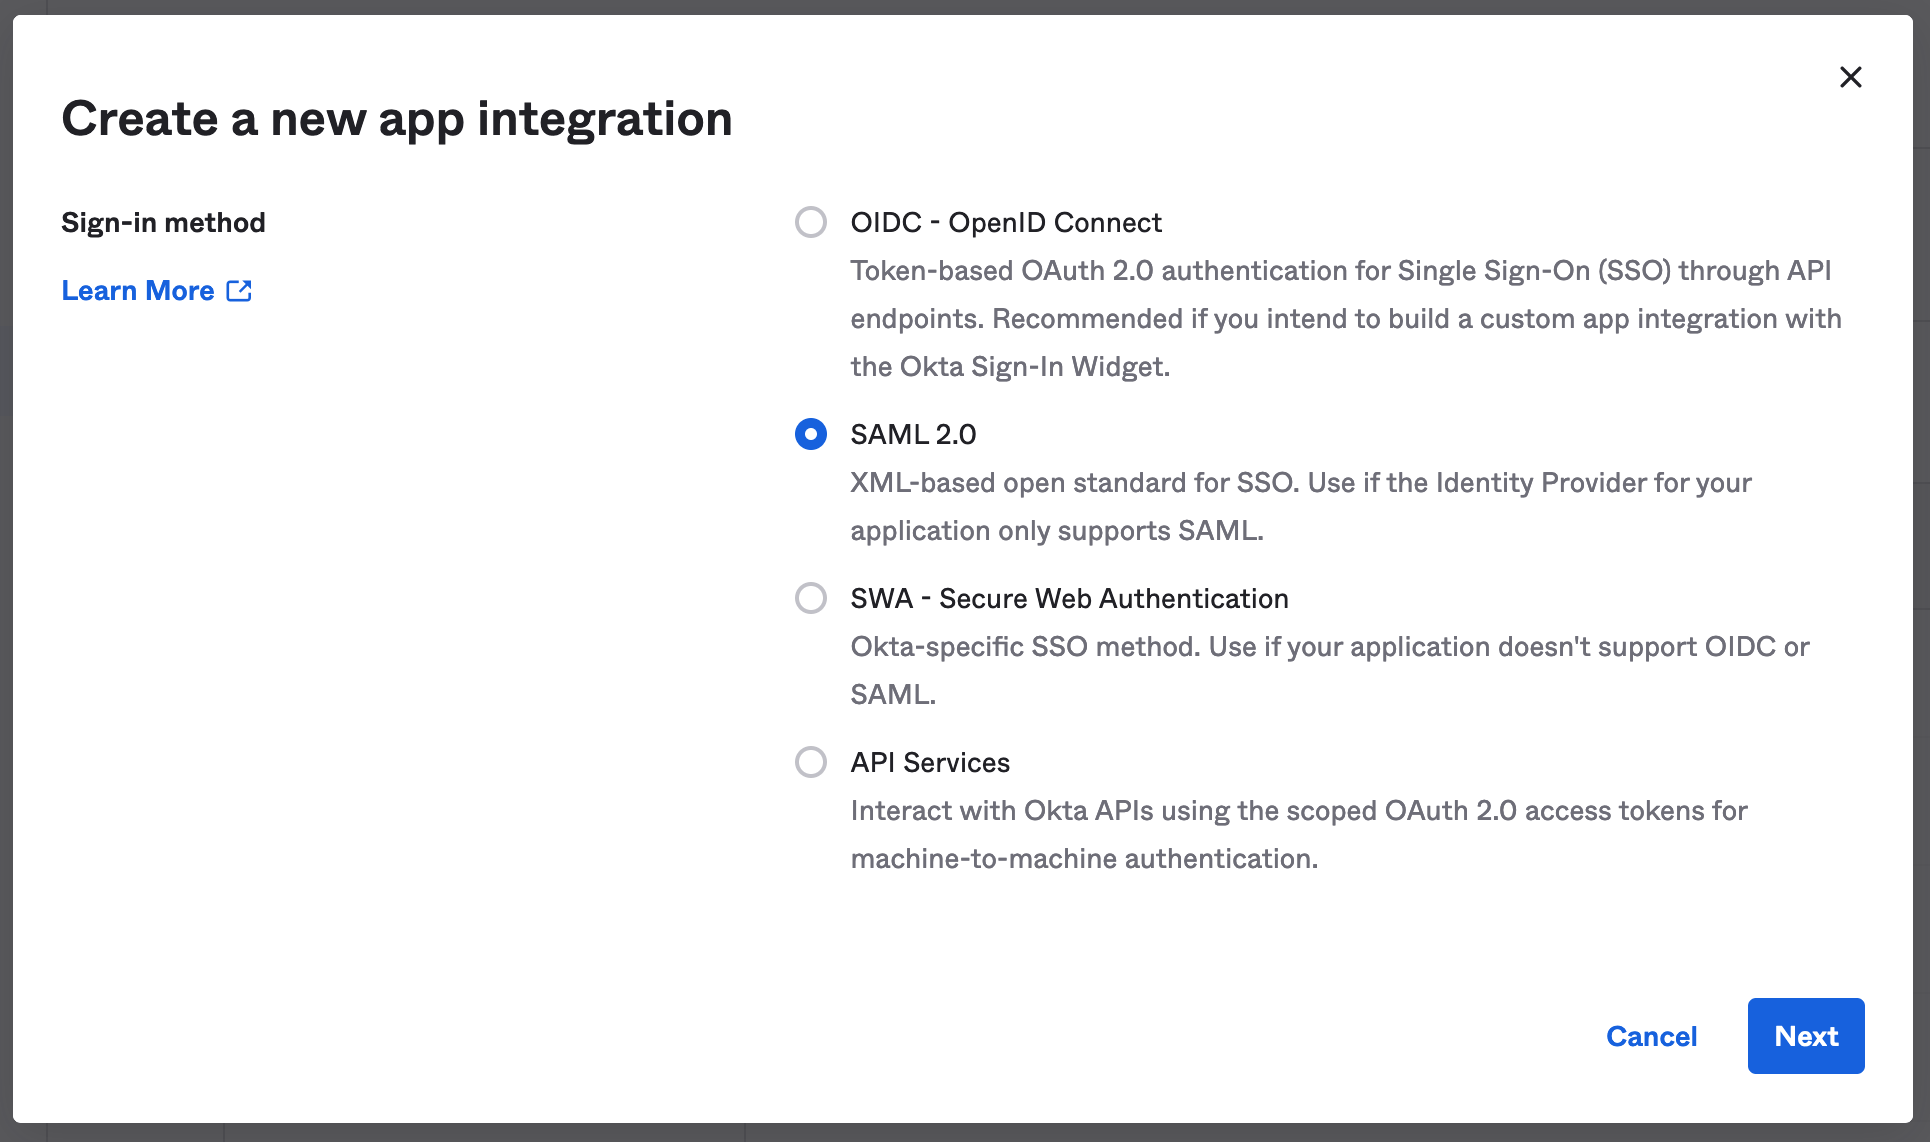
- Click Next.
Update the General Settings
In the next screen, set the App Name to
TeleRetro.Then click the image below to download the TeleRetro logo, and upload it as the App Logo.

Your configuration should now look like this:
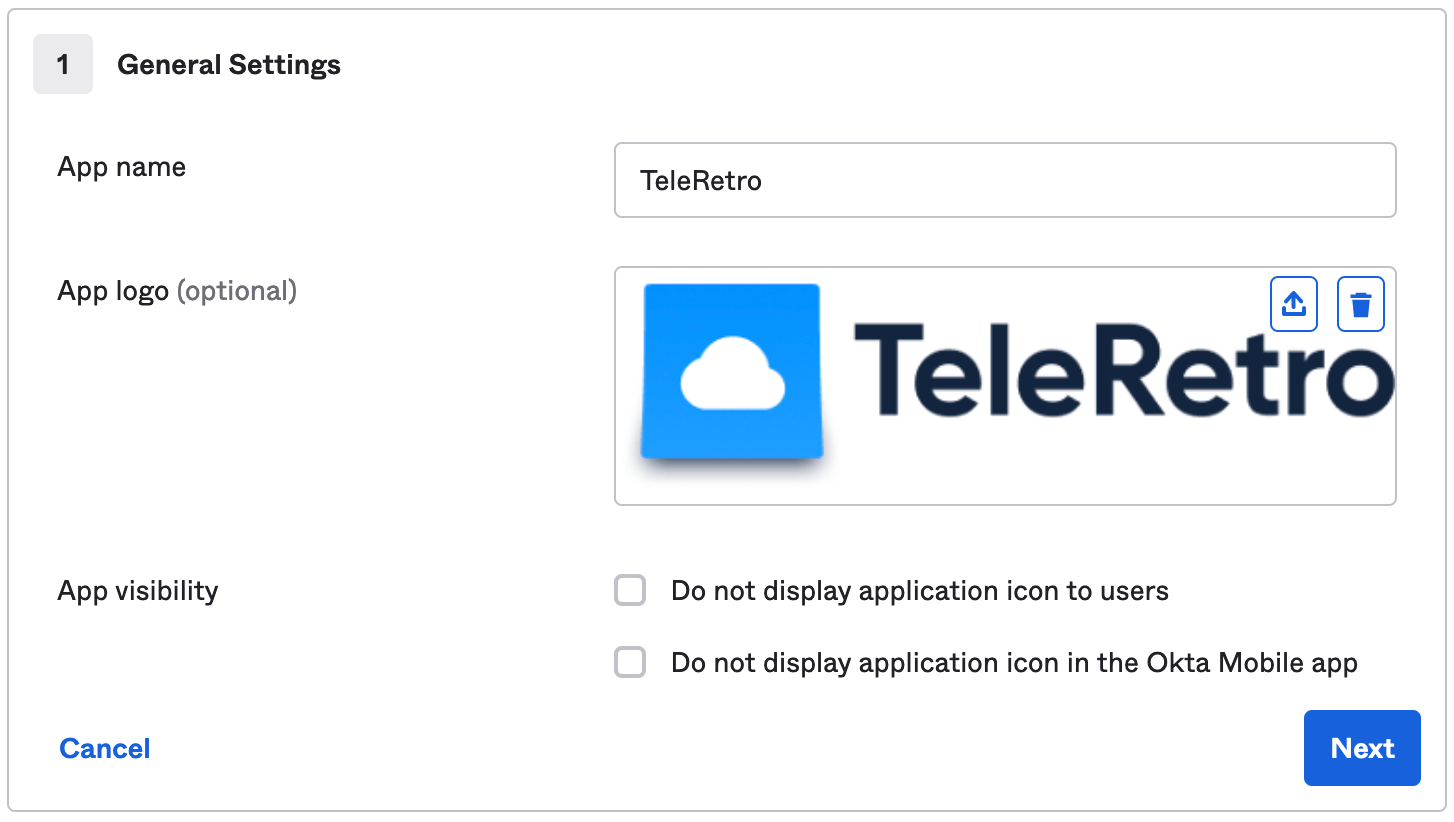
Click Next.
Update the SAML settings
In this step update the SAML settings to look as follows:
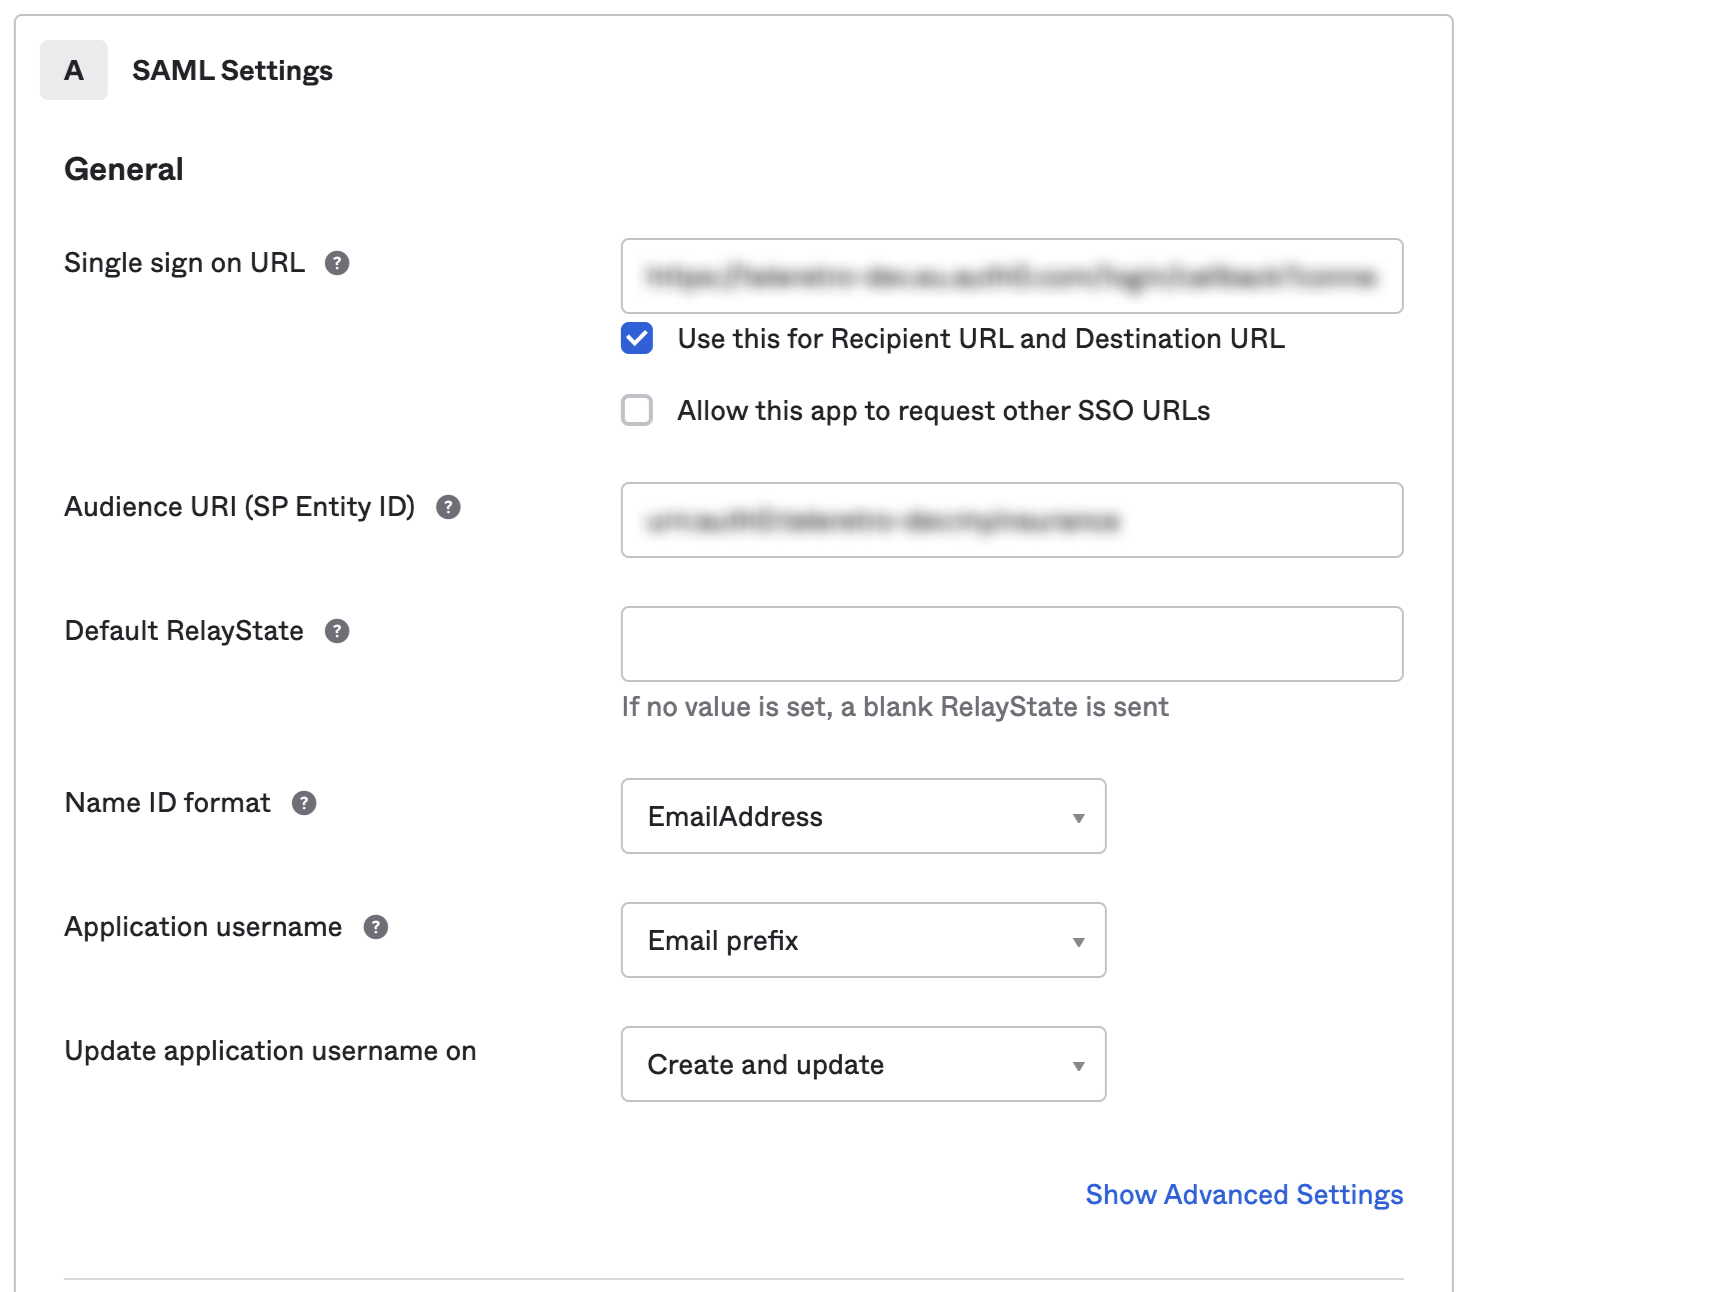
To do so, you will need:
- Single sign on URL: TeleRetro will provide you with an ACS URL to paste into this field.Make sure that 'Use this for Recipient URL and Destination URL' is checked.
- Audience URI (SP Entity ID): TeleRetro will provide you with an SP Entity ID to paste into this field.
- Name ID format: select
EmailAddress. - Application username: select
Email prefix.
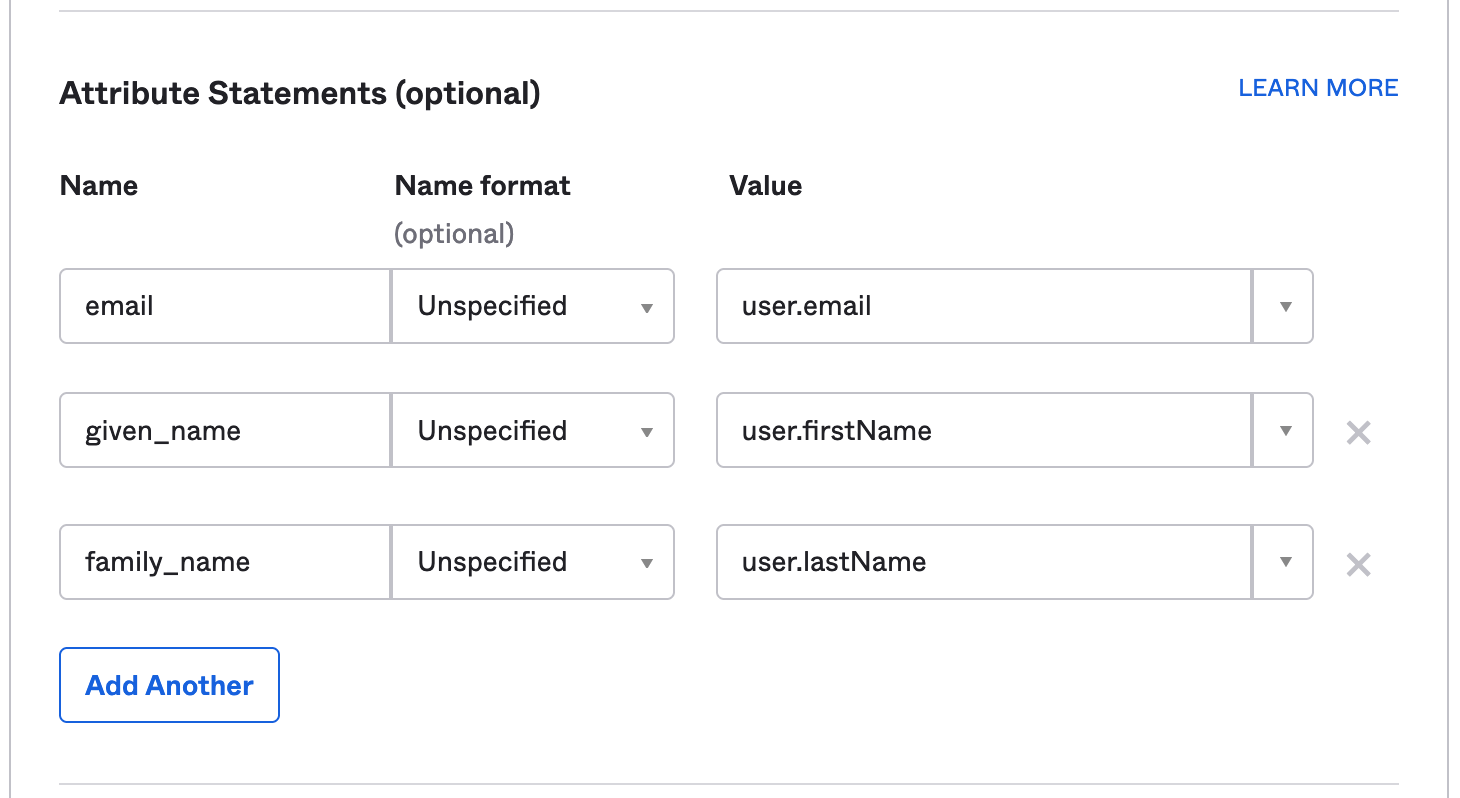
In the Attribute Statements section, add the following entries:
- email -
user.email - given_name -
user.firstName - family_name -
user.lastName
It should look like this:
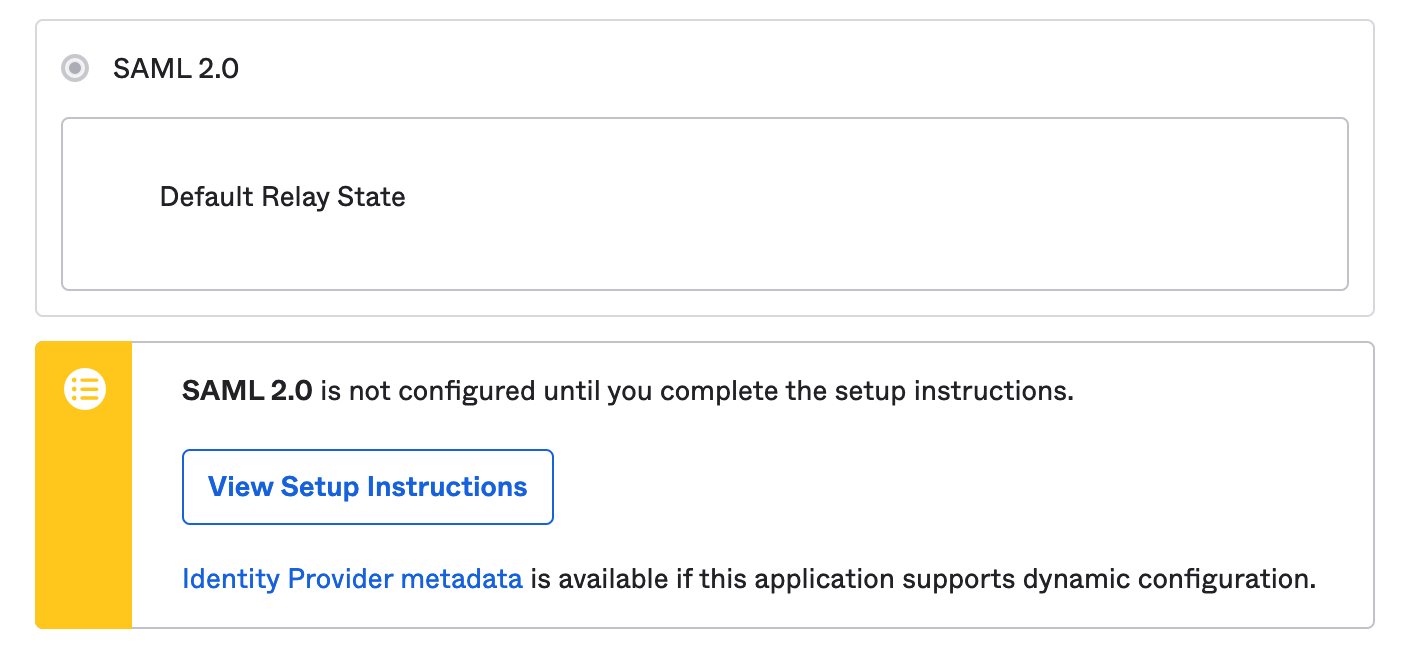
Copy the Identity Provider metadata link.
Underneath View Setup Instruction, right click on the blue Identity Provider metadata text and copy the URL. You will need to provide this link to TeleRetro in the next step.
2. Complete the SAML connection in TeleRetro
Provide the Identity Provider metadata link to the TeleRetro support team. We will use this link to complete the SSO configuration.
Well done! Now grab a cup of tea 🍵 or coffee ☕ and we will send you a confirmation once the SSO configuration is complete.
3. Test the new connection
Once all previous steps are completed, you are now ready to test your new SSO connection.
- Inside Okta, find the new TeleRetro app and assign it to users. See instructions from Okta for information about how to do this.
- Open the Okta 'My apps' page as user, launch the TeleRetro app to test that you are able to successfully sign into TeleRetro using Okta.
If you have any trouble, feel free to reach out to support@teleretro.com where we will be happy to help you.
Experience a better retro
Create a retro in seconds & see for yourself.